
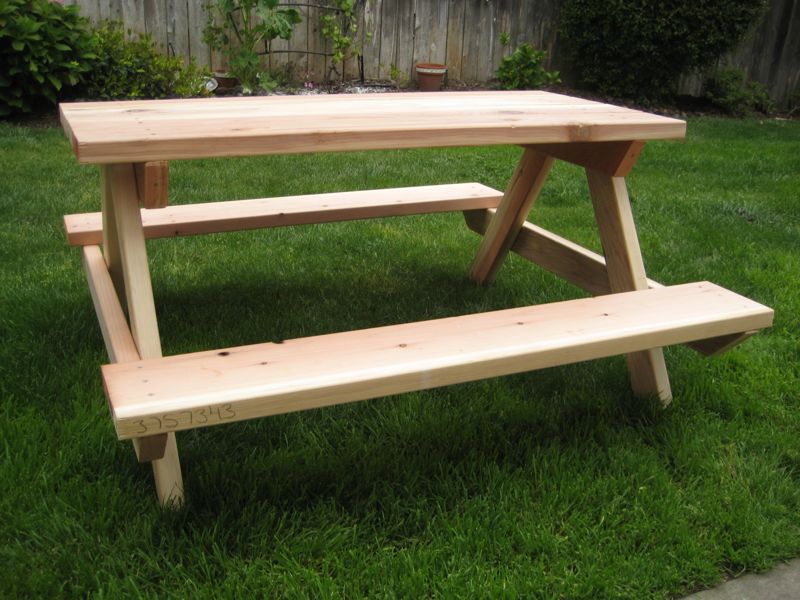
My sister, Megan, made a beautiful picnic table for her children. I loved it and so she gave me the instructions on how to make one. Megan is able to get her lumber marked down in the cull lumber pile. I could not find such lumber at the hardware store so I had to buy it full price. The lumber was $60, plus sand paper and stain. It took my husband (with me helping) 2 hours to make this.


2 2x6’s for table top
3 2x4’s for legs and supports
- Cut the table top first. I’d recommend cutting the wood in half so you get a longer table. Should be about 4’ long if you cut it in half. Use four halves to make up the table top. *The seats will be the same length as the table top so you can cut those now too.
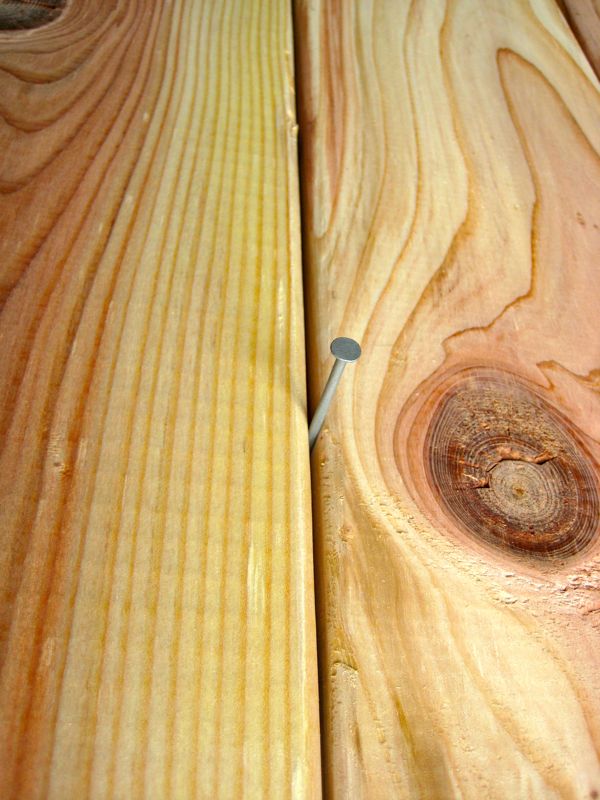
- Space out your pieces of wood for the top leaving a small crack between each piece. Putting a nail between each board helps the spaces be uniform.


- Place the 2x4’s about 4” in from the ends of the table top of wood. Make sure that the wood is parallel by puting a peice of wood on the end. It was easiest to put the 2x4 on top of the table peices and counter sink a screw into the angled peice on each end. Then repeat with the other side. Turn over the table and reposition the planks on the 2x4s.
- Predrill through the table top and into the braces. Screw in your screws. We used 8x3 inch screws for the table top.


- Legs: Using a 2x4, cut legs at a 30 degree angle at 26” long. You need four.

- Stand the table top on end, clamp two legs onto the brace. Drill four screws into each leg/brace piece. We had to use 8x2 1/2 inch screws for the legs otherwise it will go through. The table should be balanced when you stand it on all fours. If not, you may need to fix a leg.


- The braces should be about 11-12 inches past the legs on each side. We usually put them about 10-12 inches off the ground. (on this table we went 11 inches past the legs for the brace and 10 inces off the ground.) Hold up a 2x4 and see what would work best on your table. Cut each end at an angle. Putting the braces for the seats on is the trickiest part. Put your table on a level surface. Put the brace on the outside of the legs to give the kids more leg room. We found the easiest way to get the brace on was to put a bucket underneath the brace. We then measured each side of the brace to make sure it was even on each side. Clamp down and re-measure. Put the other brace on the other side using the same method. Use a level and make sure both braces are level. Then sit the seat on each side and see if the seat is level. If all looks good, screw braces into legs with four screws each. Screw from the inside to make it look nicer.

- Set seats on top, line up and screw in with 2 screws on each side of the seat.
- Sand, stain the wood and enjoy!

We (and when I say we I mean Chris) applied an oil based natural stain to protect the wood and bring out the beautiful natural colors of the wood.


1 comment:
So glad you're enjoying your new picnic table. Great job on it! It looks amazing. Jared and Kendall's table is about 1/2 that size and they all eat at it nearly every night. :) It's in their kitchen.
Post a Comment