So I have pinned so many great signs and things I want to make on pinterest. I wanted to make something great for my house. When I see things like this in stores, I won't buy them because I know I can make it. And then I don't. Until now.
My sister is actually the inspiration for all that I am making. She made some wooden signs for her house and I begged her to make me one as well. When I visited her a few months ago, she made one of the signs with me that I wanted. I headed home, wanting to do it myself.
My friend and I drove all around Sonoma county looking for old fence boards that we could have. I finally found one house with a ton of broken up fences next to their house. I asked the family for some of the wood. This was their firewood, so the husband didn't really want to give it to me. I asked for just a few pieces of fence and promised to make her a sign out of part of it. She graciously gave me four parts of the fence. (Don't worry, they still had lots for their fireplace)
After the wood sat all summer, I finally got around to making something out of it.
 My husband showed my friends and I how to use a chop saw safely. Yeah, we managed to cut what we wanted and had all fingers intact.
We took a hammer and chisel to the wood to help "age" the wood a bit more. This was fun!!
Making our signs a bit more weathered and beautiful. (to us. My husband just doesn't get this)
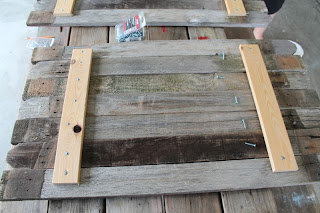
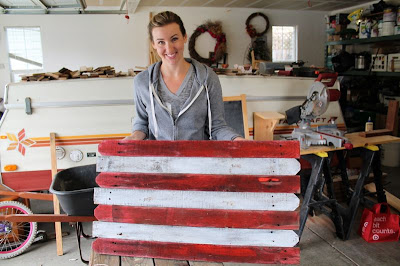
I had pinned this Rustic Flag Sign awhile ago and both my friend and I wanted to make it. So we watered down some paint (making it look weathered and rustic, right?) and carefully painted red and white boards. We painted them first, assembled them, screwed them together and had a cool looking sign.
All assembled and ready to add the star.
I put two screws in each of the wooden boards.
Then I put a wire between them to hang up my sign.
I couldn't find a good start template on line,
so I took a star off of my fence and traced it onto my sign.
I used little nails and a very manly hammer (I hope to get a cute pink one someday) to make a star design on the flag.
I made each of the nail about a centimeter apart. In retrospect, I would have left them a bit longer and made sure they weren't aimed in at all. It is harder to get the string wrapped and staying put when they are short and not straight.
Tie the string around one of the nails. Leave a long piece at the end. It will make it easier to tie off at the end. I left mine way too short and it was harder to do.
We used a very thin yarn to make our star. I wrapped the outline of the star. Each time I changed direction, I wrapped the yarn around the nail once and then kept going. I am going to add a few drops of glue to the outside of the star. This will keep it in place even if a little child's fingers find this sign.
All ready to tie it off. I tied the end of the string to the beginning tail of the string I left.


1 comment:
Looks cool! I love it!! Great job!
Post a Comment